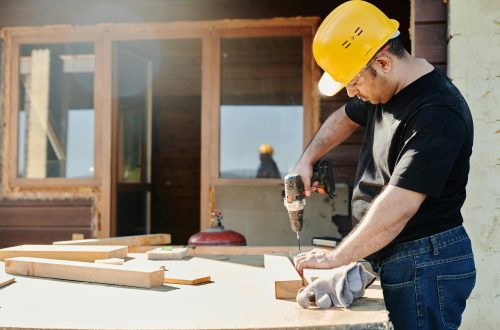
Trailers are among the most resilient utility investments you can make. Whether you own a enclosed cargo trailer used for mobile work, a utility trailer for hauling equipment, or an older travel trailer designed for weekend getaways, the core foundation—a heavy-duty steel or aluminum chassis—is built to last for decades. However, while the structural frame may remain completely sound, the components attached to it inevitably show their age over time.
Restoring the Chassis and Outer Shell

Before investing time and money into cosmetic or interior improvements, you must ensure the structural foundation and outer protective shell are structurally sound. Over time, road salt, rain, and gravel impacts strip away protective coatings, exposing raw metal to oxidation and frame corrosion.
Begin by inspecting the entire underside of the trailer frame. Pay close attention to high-stress areas such as the tongue assembly, spring hangers, axle mounting plates, and crossmember welds. Surface rust can be scraped down, treated with a chemical rust converter, and coated with a durable rubberized undercoating. However, if you discover deep structural flaking or cracked welds, these must be addressed professionally before proceeding with any additional modifications.
- Address Exterior Body Dents: Aluminum skin panels can often be smoothed out from the inside using specialized body hammers and dolly sets to restore a flat surface profile.
- Refinish Weathered Panels: Sand down oxidized aluminum or fiberglass skins, apply a high-adhesion primer, and paint the exterior using automotive-grade polyurethane paint.
Consulting a certified local trailer repair shop ensures structural frame stress cracks are professionally welded before adding cosmetic upgrades. Additionally, taking a hands-on dent removal class provides DIY owners with the specialized body hammer techniques needed to smooth out aluminum panels without stretching the metal.
Roof Resealing, Waterproofing, and Exterior Overhead Maintenance
Water intrusion is the single greatest threat to any enclosed trailer. Once moisture penetrates the roof seams, it quickly rots interior wall plywood, ruins ceiling insulation, and creates ideal conditions for toxic mold growth. Older trailers feature roof designs that flex under road movement, causing traditional silicone sealants to crack, pull away, and fail.
Modern waterproofing strategies focus on continuous elastomeric barriers that expand and contract alongside the building materials. Inspect every roof seam, vent fan flange, and rivet line. Strip away old, brittle caulk down to bare metal using a plastic scraper to avoid gouging the roof panel. Clean the surface thoroughly with isopropyl alcohol or acetone to remove grease, dirt, and residual oil.
- Apply Self-Leveling Lap Sealants: Use specialized RV lap sealants around all horizontal roof penetrations, vents, and skylights to form a watertight, flexible dome seal.
- Roll On Elastomeric Coatings: Coat the entire roof surface with a bright white liquid silicone membrane to seal micro-cracks while reflecting up to 85% of solar radiation.
Executing a thorough flat roof repair using modern elastomeric sealants prevents water pooling from destroying internal ceiling panels and structural framing. Consulting local roofers experienced in commercial membranes can help identify the best sealant primers for aluminum and EPDM surfaces to ensure long-lasting adhesion.
Lighting, Electrical Systems, and Road Safety
Older trailers were typically built with incandescent clearance markers, tail lights, and basic halogen interior fixtures. These traditional bulbs draw heavy electrical current, run hot, and feature fragile filaments that snap easily under harsh road vibrations. Upgrading your trailer’s electrical infrastructure dramatically improves visibility on the highway while reducing the strain on your tow vehicle’s alternator.
Start by replacing all exterior clearance markers and tail light housings with sealed LED units. LEDs draw roughly 80% less power than incandescent bulbs, illuminate instantaneously, and last for tens of thousands of operating hours. When rewiring, replace old, brittle trailer wiring harnesses with a modern, molded 7-way RV plug connected to an weatherproof junction box mounted on the trailer tongue.
- Upgrade Ground Connections: Run dedicated copper ground wires directly to every light fixture rather than relying on the trailer frame, which is prone to rust-induced electrical resistance.
- Protect Electrical Runs: Enclose all exposed exterior wiring in split-loom tubing or flexible conduit to shield against flying gravel, road debris, and salt corrosion.
Always use heat-shrink solder connectors instead of cheap quick-splice crimp connectors when making wire joints. Heat-shrink connectors seal the copper wire permanently against moisture, preventing green corrosion from creeping up the wire jackets and causing intermittent light failure on the road.
Interior Climate Control and HVAC Upgrades
If your trailer is used as a mobile workshop, toy hauler, or camper, maintaining a stable, comfortable interior temperature is vital. Uninsulated metal or fiberglass trailers act like ovens in the summer and freezers in the winter. Modernizing climate control systems involves two key components: adding thermal insulation and upgrading heat-management equipment.
Remove old wall paneling to install rigid polyisocyanurate foam boards or closed-cell spray foam insulation between the wall studs and ceiling joists. Pay close attention to eliminating thermal bridging—where heat transfers directly through the metal framing studs—by applying thin foam tape or thermal breaks along the inner edges of the metal studs before reinstalling wall panels.
- Install High-Efficiency Rooftop ACs: Upgrade aging rooftop units to modern, low-profile heat pumps featuring soft-start capacitors that run easily on portable generator power.
- Deploy Mini-Split Heat Pumps: For ultimate efficiency and ultra-quiet operation, mount a ductless mini-split system with the compressor secured to the trailer tongue.
Scheduling specialized ac repair for older rooftop units helps diagnose low refrigerant levels or bad start capacitors before committing to a full system replacement. Once the climate equipment is performing efficiently, you can maintain precise temperature control without continuously overloading your electrical circuits.
Off-Grid Water Supply and Utility Systems
Updating an older trailer’s plumbing infrastructure transforms it from a basic shell into an independent, self-contained basecamp. Older plumbing systems typically relied on rigid PVC or copper pipes, both of which are prone to cracking under road vibration or bursting during unexpected winter freezing spells.
Modern mobile plumbing relies entirely on Flexible Cross-linked Polyethylene (PEX) tubing. PEX expands slightly if water freezes inside it, making it exceptionally resistant to winter damage. Pair PEX lines with quick-connect push-to-connect fittings or stainless steel cinch clamps for leak-free, vibration-dampened fluid delivery across your entire layout.
- Upgrade to Lithium Water Pumps: Install a modern, variable-speed 12V diaphragm pump that adjusts water flow automatically based on demand, eliminating loud pressure surging.
- Install Multi-Stage Water Filtration: Mount a dual-stage sediment and carbon block filter system on the main supply inlet to screen out sand, rust, and chlorine taste.
Working with an experienced water well driller ensures your rural property basecamp has a high-yield, tested water hookup for filling mobile tanks safely. Hiring a licensed well drilling company to install a dedicated property hydrant guarantees clean, pressurized water when staging your trailer for extended stays.
Advanced Property Water Connections and Maintenance
When staging a trailer on rural acreage, connecting your updated plumbing system directly to deep-well supply lines requires specialized precautions. High pressure from property well pumps can easily burst delicate interior PEX fittings or RV water heater tanks if connected directly without pressure regulation.
Always connect a heavy-duty, adjustable brass water pressure regulator to the city water inlet, setting the internal delivery pressure between 40 and 50 PSI. Furthermore, seasonal well water often carries mineral sediment, iron, and dissolved minerals that form hard scale inside water heater tanks and internal pump valves over time.
- Sanitize Water Systems Regularly: Flush fresh water holding tanks bi-annually using a mild food-grade bleach solution to eliminate stagnant bacterial growth.
- Install Anode Rods in Heaters: Check and replace the sacrificial magnesium anode rod inside steel water heater tanks annually to stop tank wall corrosion.
Utilizing professional well services to test water quality at your staging site prevents mineral scale buildup inside your trailer’s water heater and plumbing fixtures. Testing for iron, sulfur, and particulate matter allows you to select the precise inline filtration filters required to protect your plumbing setup.
Interior Storage, Hardware, and Component Upgrades
Older trailers often suffer from disorganized interiors dominated by heavy, immovable particle-board cabinetry or flimsy plastic shelving. Modern interior upgrades focus on lightweight strength, modular versatility, and securing cargo safely against shifting during transit.
Strip out heavy, water-damaged wooden fixtures and replace them with modular aluminum or high-density plastic storage systems. Aluminum wall tracks, fold-down workbenches, and overhead storage cabinets maximize floor space while drastically reducing the trailer’s overall gross vehicle weight.
- Mount Wall-Anchored Utility Tracks: Install heavy-duty E-track or L-track aluminum rails along wall studs using grade-8 fasteners to create endless tie-down points for tools and gear.
- Upgrade Door Latches and Hinges: Replace rusted exterior door hardware with heavy-duty stainless steel bar locks, anti-rack cam latches, and adjustable door hold-backs.
Sourcing high-quality trailer parts like heavy-duty ramp springs and stainless steel door latches restores effortless daily functionality to heavy access doors, making loading and unloading safe and convenient.
Exterior Living Extensions and Outdoor Deck Platforms
Modernizing a trailer is not limited to what happens inside the walls. Expanding your usable footprint outward creates functional zones for working, cooking, or relaxing without increasing the towing length of your setup. Toy haulers and enclosed trailers are particularly well-suited for exterior platform conversions.
Utilizing the rear ramp door as an elevated patio deck is one of the most effective modern upgrades available. By installing high-tensile steel support cables, folding corner jacks, and perimeter safety railings, a standard ramp door converts into an elevated outdoor living platform in less than five minutes.
- Install Retractable Side Awnings: Mount a heavy-duty vinyl or acrylic cassette awning along the curb side of the trailer to provide instant shade and rain protection over entry doorways.
- Add Exterior LED Scene Lighting: Mount high-output, low-draw LED floodlights on side and rear exterior walls to illuminate outdoor work areas during night operations.
Building custom fold-out decks off side access doors creates elevated, bug-free outdoor seating zones at campsites or job sites. Always use lightweight, weather-resistant composite or aluminum materials rather than traditional heavy lumber to ensure you do not exceed axle load capacities.
Wheel, Axle, and Suspension Upgrades
No matter how impressive your interior and exterior modifications look, your trailer is only as reliable as the suspension system rolling underneath it. Aging leaf springs sag over time, rubber torsion axles dry-rot and lose their dampening ability, and mechanical drum brakes collect brake dust and rust internally, drastically reducing stopping power.
Inspect leaf spring assemblies for flat or inverted main leaves, worn nylon bushings, and rusted U-bolts. Upgrading to a heavy-duty leaf spring equalizer system with wet shackle bolts (bolts featuring grease zerk fittings) dramatically smoothes out the ride, preventing road shock from vibrating through the trailer body and damaging interior cargo.
- Upgrade to Electric-Over-Hydraulic Disc Brakes: Replace traditional drum brakes with hydraulic disc brake kits for dramatically shorter stopping distances and fade-free performance on steep descents.
- Repack Wheel Bearings Annually: Clean, inspect, and repack wheel bearings with high-temperature synthetic grease every 12,000 miles or once per year to prevent spindle failure.
Always verify wheel lug torque specifications after installing fresh wheels or servicing hubs. Re-torque lug nuts after the first 50 miles of travel following any wheel service to ensure studs sit firmly against the wheel chamfers.
Modernizing Electronics, Solar Power, and Interior Finishes
The final phase of modernizing an older trailer involves integrating modern off-grid power generation and updating interior surface finishes to create a clean, professional aesthetic. Older 12V systems relied on heavy, slow-charging lead-acid batteries that could only be discharged down to 50% capacity without causing permanent battery damage.
Modern off-grid electrical setups center around Lithium Iron Phosphate (LiFePO4) battery chemistry. Lithium batteries weigh half as much as lead-acid batteries, can be safely discharged down to 100% of their rated capacity, and charge four times faster. Pair your battery bank with roof-mounted monocrystalline solar panels and a smart MPPT charge controller for silent, continuous battery maintenance.
- Install Pure Sine Wave Inverters: Convert 12V DC battery power into clean 120V AC household electricity to run sensitive electronics, power tools, and appliances without utility hookups.
- Apply Heavy-Duty Coin Rubber Flooring: Cover worn plywood subfloors with roll-out, coin-patterned rubber or PVC flooring to create a waterproof, chemical-resistant surface that cleans easily.
When installing roll-out rubber flooring, use a full-spread, water-resistant adhesive and roll the surface with a heavy roller to press out trapped air pockets. Sealing perimeter edges with aluminum angle trim prevents water from seeping under the rubber edge during cleaning.
Modernizing an older trailer is one of the most rewarding DIY projects a property owner or contractor can undertake. Rather than discarding a structurally sound steel or aluminum frame to buy a costly new replacement, strategic upgrades allow you to build a custom unit built specifically around your lifestyle, work demands, or travel needs.
Approach the restoration step by step, focusing on structural integrity and weatherproofing before moving on to interior finishes. With the right materials, proper maintenance habits, and a clear vision, your modernized trailer will deliver reliable service, impressive functionality, and smooth towing for many miles down the road.